
Microgreens farming is one of the easiest and most rewarding things you can do right at home. Whether you have a big terrace or just a small balcony, you can grow fresh, healthy, and tasty greens without any big investment. Imagine stepping outside every morning and picking your own greens for your salad, sandwich, or smoothie sounds amazing, right?
In India, more and more people are discovering how simple microgreens farming really is. You do not need a farm, heavy machinery, or even a lot of soil. All you need is some seeds, a few trays, water, sunlight, and a little bit of patience. Even a student or a homemaker with zero gardening experience can do this successfully.
In this blog, we will walk you through everything from what microgreens are, to setting up your space, choosing seeds, watering, harvesting, and even selling them. By the time you finish reading, you will feel confident enough to start your own little green patch today.
What Are Microgreens and Why Are They So Popular?
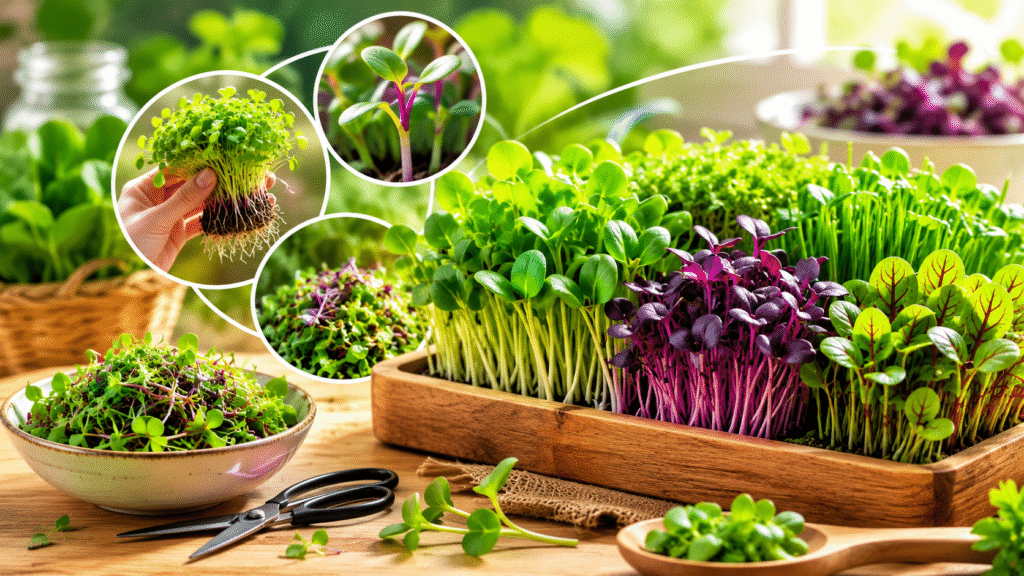
Microgreens are tiny young plants that are harvested just after the first leaves appear. They are usually between 1 to 3 inches tall. Think of them as baby versions of vegetables and herbs like sunflower, radish, peas, mustard, fenugreek, and wheat.
Even though they are small in size, they are huge in nutrition. Studies show that microgreens can have up to 40 times more nutrients than their fully grown versions. They are packed with vitamins, minerals, and antioxidants. This is why chefs, health-conscious people, and fitness lovers are going crazy over them.
They also look beautiful on a plate, which is why restaurants and cafes love using them as garnishes. And because they grow so fast in just 7 to 14 days microgreens farming has become a favourite hobby and even a side income source for many Indians.
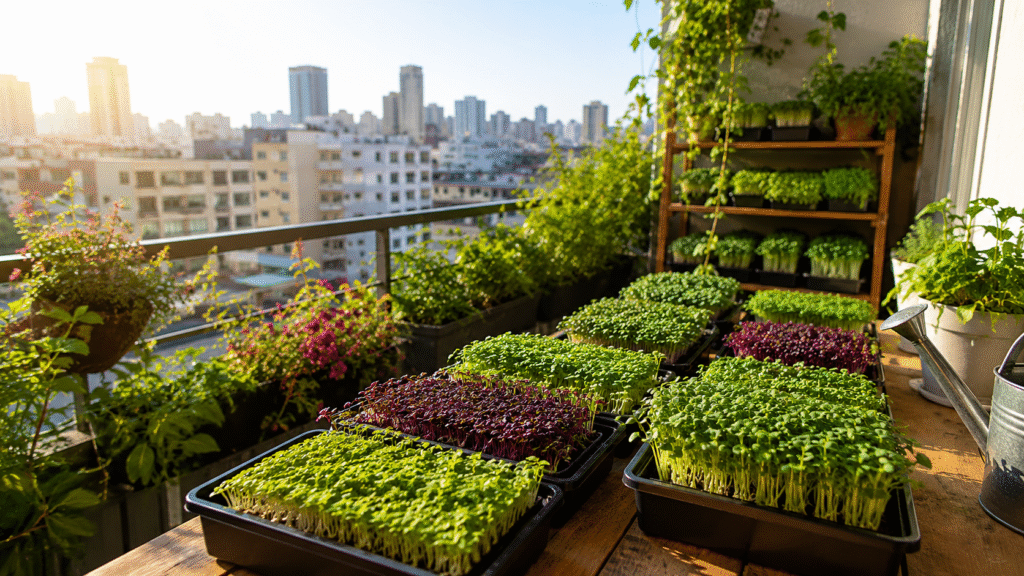
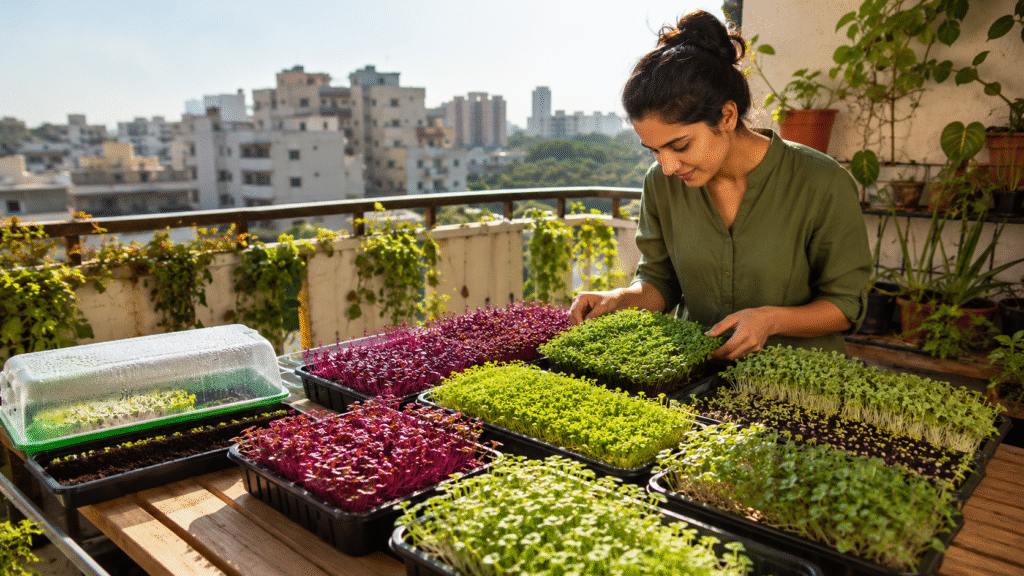
Why Your Terrace or Balcony Is Perfect for Microgreens Farming
Most people think you need a big piece of land to grow food. But microgreens farming does not work that way. Your terrace or balcony is actually an ideal space for it. Here is why:
Small space, big yield: Microgreens grow in shallow trays, not deep soil beds. Even a 2×2 feet space can produce a good amount of greens every week.
Natural sunlight: Terraces and balconies get direct sunlight for a few hours every day, which is exactly what microgreens need.
Fresh air circulation: Good airflow prevents mold and keeps your plants healthy and outdoor spaces naturally provide this.
Low maintenance: You only need to water them once or twice a day. No digging, no pruning, no complicated care.
Cost-effective: The startup cost is very low usually under ₹1,000 to ₹2,000 for a beginner’s setup.
Whether you live in Delhi, Mumbai, Bangalore, or any other city, your terrace or balcony can become a small productive green farm with almost no effort.
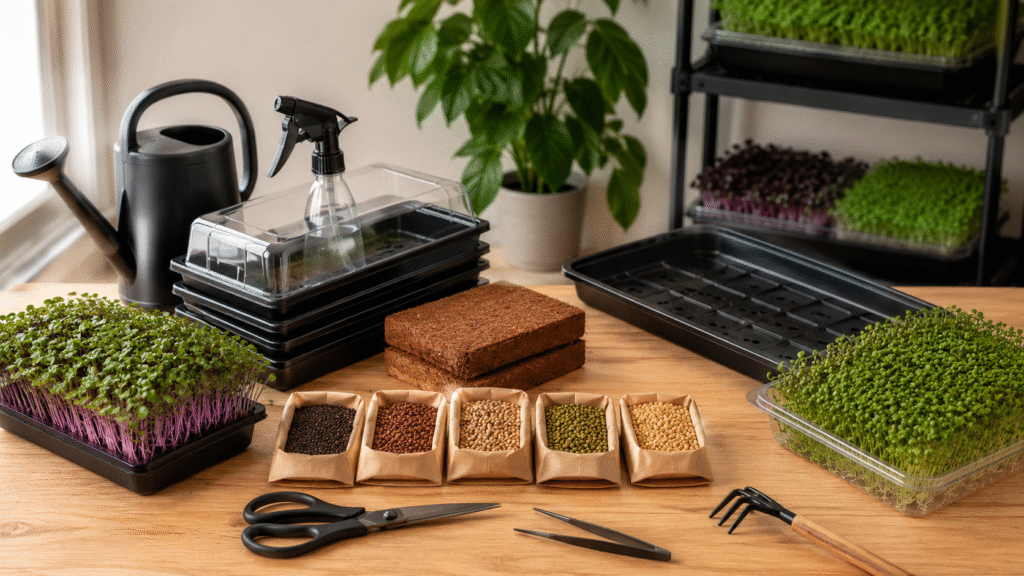
Things You Will Need to Start Microgreens Farming at Home
Before you start, let us gather everything you need. The good news is most of these things are easily available online or at your local nursery or market.
1. Growing Trays
Use shallow plastic trays with drainage holes. Standard size is 10×20 inches. You can also reuse old food containers or baking trays. Just make sure water can drain out from the bottom.
2. Growing Medium
You can use:
- Regular potting mix or cocopeat (best option)
- A mix of cocopeat and vermicompost (great for nutrition)
- Jute mats or tissue paper (for hydroponic style no soil needed)
Cocopeat is lightweight, clean, and easy to find. It is perfect for microgreens farming on terraces because it does not make a mess.
3. Seeds
Choose seeds that are specifically meant for microgreens do not use chemically treated seeds. Some great beginner options are:
- Radish (mooli) — grows in 5–7 days
- Mustard (sarson) — grows in 6–8 days
- Fenugreek (methi) — grows in 7–10 days
- Sunflower — grows in 10–12 days
- Peas (matar) — grows in 10–14 days
- Wheat (gehun) — grows in 8–10 days
4. Spray Bottle or Watering Can
You need to water gently without disturbing the seeds. A spray bottle works best in the early days.
5. Light Source
Your balcony or terrace sunlight is enough for most microgreens. They need at least 4–6 hours of indirect or direct light per day.
6. Plastic Wrap or a Cover
During the germination phase (first 2–3 days), you need to cover the tray to keep moisture in and block light.
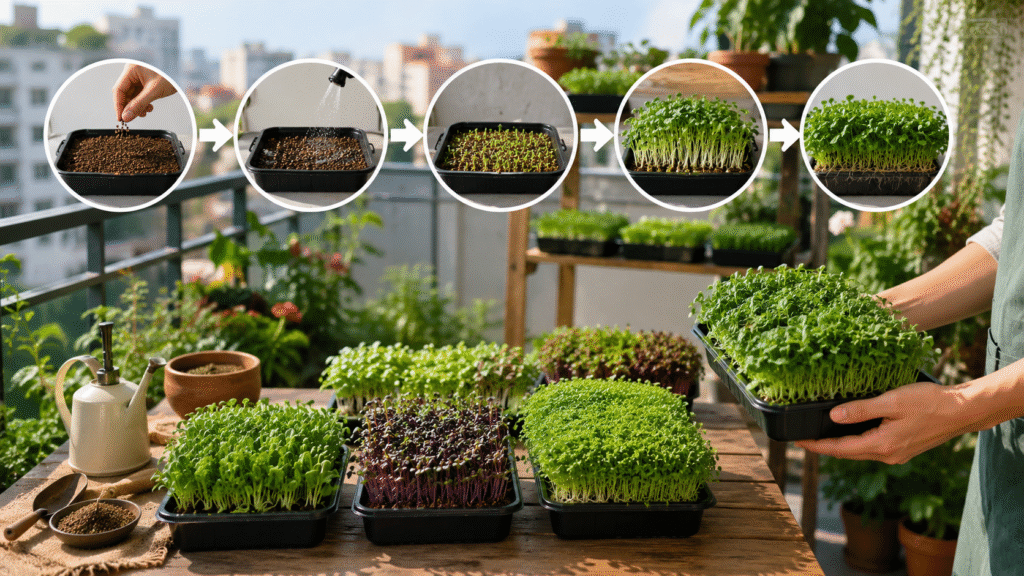
Step-by-Step Guide to Microgreens Farming on Your Terrace or Balcony
Now let us get into the actual process. Follow these simple steps and you will have fresh greens ready in less than two weeks.
Step 1 – Soak Your Seeds
Most seeds need to be soaked in water for 6 to 12 hours before planting. This speeds up germination. Larger seeds like sunflower and peas need soaking the most. Tiny seeds like radish and mustard can be planted directly without soaking.
Use clean, normal water – not hot, not cold. After soaking, drain the water and rinse the seeds once.
Step 2 – Prepare Your Tray
Fill your tray with about 1 to 1.5 inches of moist cocopeat or potting mix. Press it down gently so there are no air pockets. The surface should be flat and even.
Spray some water on the surface so it is moist but not dripping wet.
Step 3 – Spread the Seeds
Sprinkle your seeds evenly across the surface of the growing medium. Do not pile them up in one spot spread them as evenly as possible. Seeds should be close together but not completely overlapping.
For small seeds like mustard and radish, a thin even layer works perfectly. For bigger seeds like sunflower, place them side by side covering the whole tray.
After spreading, gently press the seeds down with your hand or another flat tray so they make good contact with the soil.
Step 4 – Germination Phase (Day 1 to Day 3)
Cover the tray with another tray on top, plastic wrap, or a dark cloth. This creates a dark, humid environment that helps seeds sprout faster.
Keep the tray in a shaded area not in direct sunlight during this phase. Spray water lightly once a day to keep the surface moist.
You will see tiny white sprouts popping up within 2 to 3 days. This is the magic of microgreensfarming results happen so fast!
Step 5 – Light Phase (Day 3 to Harvest)
Once you see good sprouting, remove the cover and move the tray to your terrace or balcony where it gets 4–6 hours of sunlight.
Now water the tray once or twice a day. You can water from the top gently with a spray bottle, or use the bottom watering method place the tray inside a slightly larger tray with water so the roots absorb moisture from the bottom. Bottom watering is better as it keeps the leaves dry and prevents mold.
Keep the tray in a spot with good airflow. Avoid keeping it in a corner where air does not circulate well.
Step 6 – Watch Them Grow
This is the fun part. Every day your microgreens will look different. Tiny yellow sprouts will turn into green, leafy little plants within a few days. The first real leaves called cotyledon leaves will open up and the plant will look like a miniature vegetable.
Continue watering daily. If you notice any mold on the soil surface, reduce watering and increase airflow. A small fan near your balcony plants can also help.
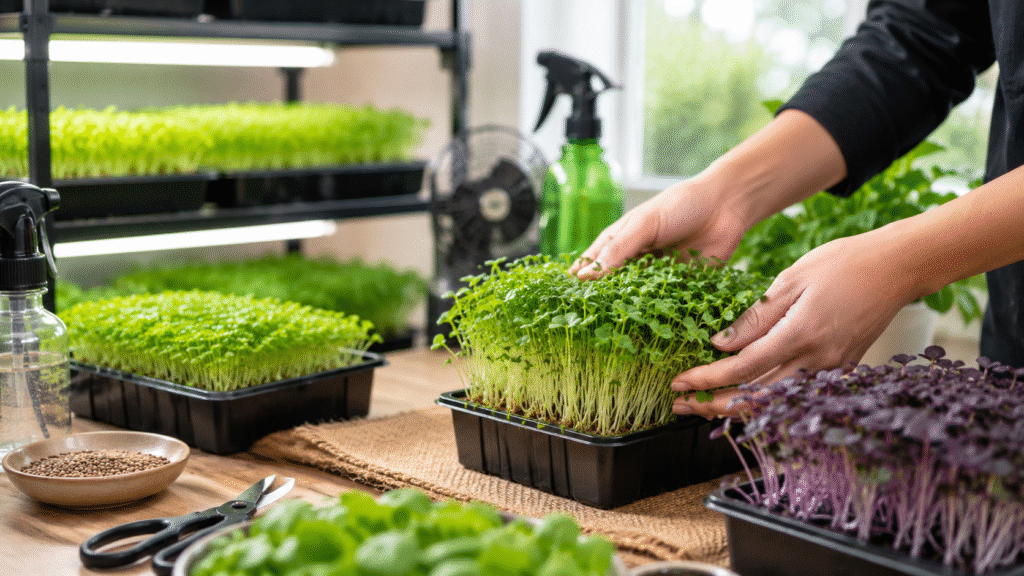
Step 7 – Harvest Time!
Most microgreens are ready to harvest in 7 to 14 days, depending on the variety. You will know they are ready when:
- The first set of true leaves start to appear
- The plants are 1.5 to 3 inches tall
- The colour is bright and vibrant
To harvest, use clean scissors and cut the microgreens just above the soil level. Cut only what you need and use them fresh. Store extras in an airtight container in the fridge they stay fresh for 5 to 7 days.
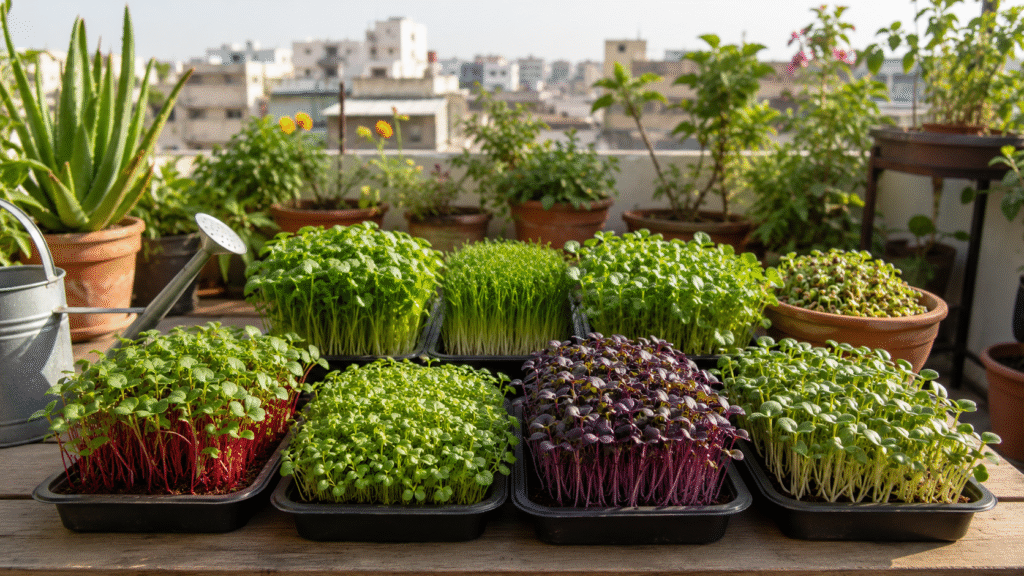
Best Microgreens to Grow on Indian Terraces and Balconies
India’s climate is warm and humid for most of the year, which is great for microgreens farming. Here are the top varieties that do really well on Indian terraces:
| Microgreen | Taste | Days to Harvest | Best Season |
| Radish | Spicy, peppery | 5–7 days | All year |
| Mustard | Sharp, tangy | 6–8 days | Winter, Monsoon |
| Fenugreek | Slightly bitter | 7–10 days | All year |
| Sunflower | Nutty, crunchy | 10–12 days | Winter, Spring |
| Peas | Sweet, mild | 10–14 days | Winter |
| Wheat | Mild, earthy | 8–10 days | All year |
| Amaranth | Mild, earthy | 8–10 days | Summer |
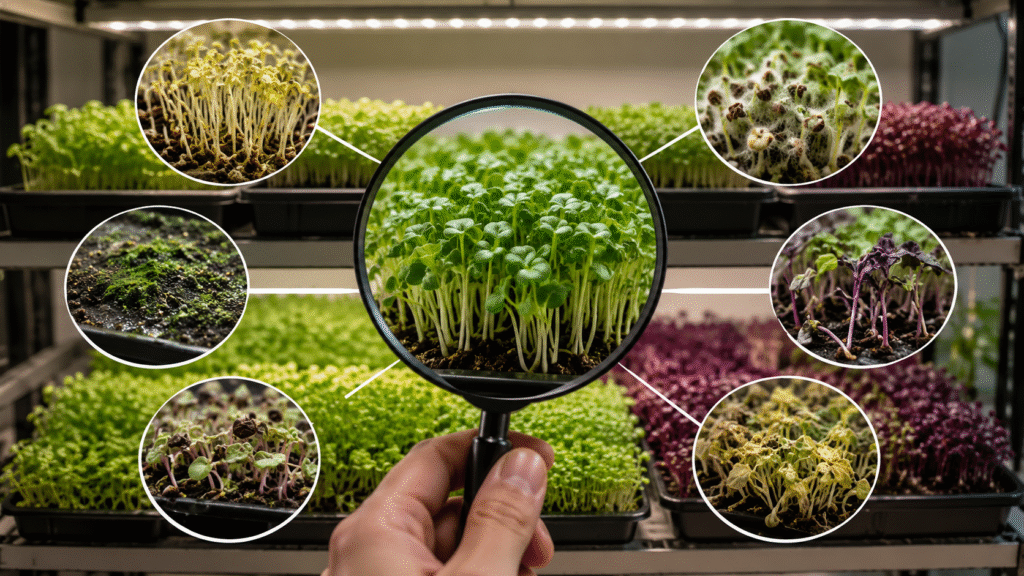
Common Problems and How to Fix Them
Even simple microgreens farming can sometimes face small issues. Here is how to handle the most common ones:
Problem: Mold on the soil
Cause: Too much water or too little airflow.
Fix: Reduce watering, increase ventilation, and try bottom watering instead of top watering.
Problem: Seeds not sprouting
Cause: Seeds are too old, or the soil is too dry or too wet.
Fix: Use fresh seeds and make sure the soil is moist but not soaking wet.
Problem: Leggy, weak plants
Cause: Not enough sunlight.
Fix: Move the tray to a sunnier spot on your terrace or balcony.
Problem: Yellow leaves
Cause: Too much shade or underwatering.
Fix: Give more sunlight and check your watering frequency.
Problem: Pests or insects
Cause: Open terrace exposure.
Fix: Use a light mesh net cover over your trays to protect from insects.
Tips to Make Your Microgreens Farming Successful
Here are some quick tips to help you get better results every time:
- Start with 2 to 3 varieties – do not try everything at once in the beginning
- Label your trays with the seed name and planting date so you do not get confused
- Keep a simple journal to track what works and what does not
- Clean your trays well between batches to avoid bacteria buildup
- Buy good quality seeds from a trusted supplier – this makes a big difference in germination rate
- Stagger your planting – sow a new tray every 3 to 4 days so you always have fresh greens ready
- Use rainwater if possible – it is natural and plants love it
Final Thoughts from Maalibhaiya
Starting microgreens farming on your terrace or balcony is one of the smartest and most satisfying things you can do. It is fast, affordable, fun, and gives you fresh food right at your doorstep. You do not need to be an expert gardener or spend a lot of money to begin.
All you need is a small space, a little curiosity, and the willingness to give it a try. Whether your goal is to eat healthier, save money on vegetables, or earn a side income microgreens farming can help you achieve all of it.
So go ahead, pick up a pack of radish or mustard seeds, fill up a tray with cocopeat, and start your very first batch today. In less than 10 days, you will be amazed at what you have grown with your own hands.
FAQ: Microgreens Farming on Your Terrace or Balcony
Q1. How much space do I need to start microgreens farming at home?
You don’t need a big space at all. Even a 2×2 feet area on your balcony or terrace is more than enough to start. Microgreens grow in small shallow trays, so even a tiny corner works perfectly.
Q2. How many days does it take to harvest microgreens?
Most microgreens are ready to harvest in just 7 to 14 days depending on the variety. Fast growers like radish and mustard are ready in as little as 5 to 7 days, making them perfect for beginners.
Q3. Do I need special soil or equipment for microgreens farming?
No special equipment is needed. Simple cocopeat or regular potting mix, shallow trays, seeds, and a spray bottle are enough to get started. The total setup cost is usually under ₹1,000 to ₹2,000.
Q4. Can microgreens farming be done indoors without direct sunlight?
Yes, it can. While natural sunlight gives the best results, microgreens can also grow well under a simple LED grow light or near a bright window. At least 4 to 6 hours of light per day is ideal.
Q5. Is microgreens farming profitable in India?
Yes, definitely. With just 20 trays growing in rotation, you can earn anywhere between ₹10,000 to ₹25,000 per month. Restaurants, cafes, gyms, and health-conscious buyers are always looking for fresh microgreens in cities.