
Growing an herb garden at home is one of the easiest and most rewarding things you can do even if you have never grown a single plant before. Fresh herbs make your food taste amazing, and you get to grow them yourself!
Have you ever wished your cooking tasted a little fresher and more flavourful? The secret is often right in your kitchen windowsill a small, beautiful herb garden. At Maalibhiya, we believe that everyone deserves to enjoy the joy of growing their own food, no matter how small their space is.
You do not need a big backyard, expensive tools, or any special skills. All you need is a little sunlight, some soil, a few pots, and a bit of care. This guide will walk you through everything step by step in simple, easy language. By the end, you will know exactly how to start your own herb garden and keep it growing strong all year.
So, let us get our hands a little dirty and grow something wonderful!
Why You Should Grow an Herb Garden at Home
Before we jump into the steps, let us talk about why starting an herb garden is such a great idea. Honestly, once you know the benefits, you will wonder why you did not start sooner.
Fresh herbs taste much better than dried ones.
If you have ever added dried basil from a bottle to your pasta, and then tasted it with fresh basil, you already know the difference. Fresh herbs burst with flavour and smell amazing.
It saves you money.
A small bunch of fresh herbs at the store can cost a lot, and you often only use a little bit before the rest goes bad. When you grow your own herb garden, you only pick what you need. No waste, no extra cost.
It is good for your health.
Many herbs like mint, Tulsi (holy basil), and rosemary have natural health benefits. Having them fresh means you get the most out of them.
It makes your home look beautiful.
A little pot of green on a windowsill or balcony makes any space feel lively and calm at the same time. Green plants are known to reduce stress too!
It is great for beginners.
Unlike vegetables or flowers, herbs are very forgiving plants. Even if you forget to water them once or twice, most herbs will bounce right back. That is what makes a herb garden the perfect first gardening project.
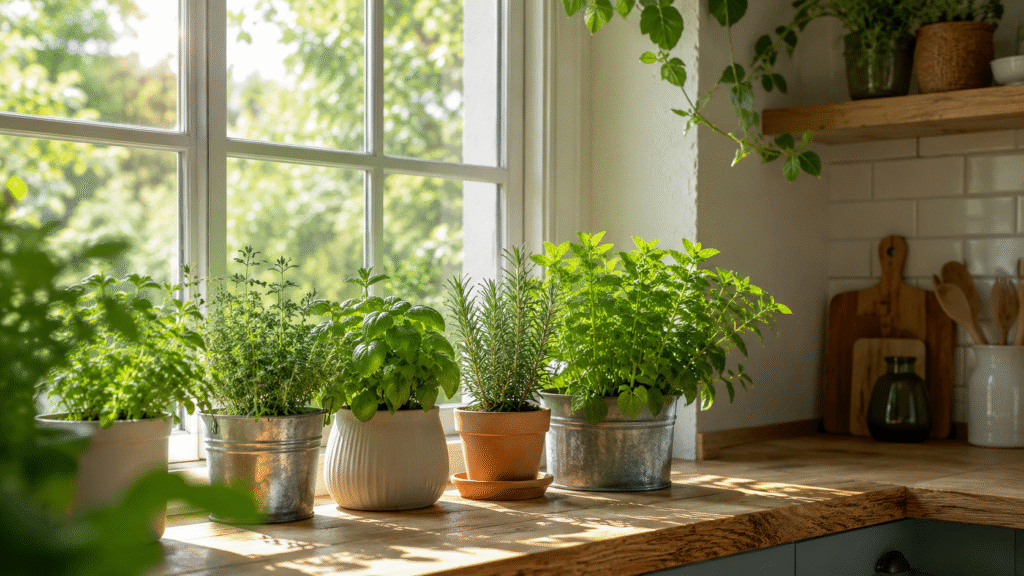
Step 1 – Choose the Right Location for Your Herb Garden
The very first step in building a successful herb garden is finding the right spot. Herbs love sunlight. Most of them need at least 4 to 6 hours of direct sunlight every day to grow well.
Here are the best places to grow your herb garden at home:
Kitchen Windowsill South or east-facing is best
Balcony or Terrace Great air & sunlight access
Backyard Corner Natural rainfall bonus
Grow Light Setup Works if no natural light
If you live in India which many of our readers at Maalibhaiya do your homes, get plenty of sunlight most of the year. A south-facing or east-facing window is usually perfect. If you only have a shady balcony, do not worry. Some herbs like mint and coriander can grow in partial shade too.
Quick Tip – Avoid placing herbs near air conditioners or heaters. The strong air blowing from these can dry out leaves and damage your plants quickly.
Step 2 – Pick the Best Herbs to Grow
Not all herbs are equally easy to grow, especially for beginners. When you are starting your first herb garden, it is smart to begin with herbs that are low-maintenance and grow quickly. That way you feel the joy of success early on!
Here are some of the best herbs to start with, especially if you are in India or a similar warm climate:
Tulsi (Holy Basil)
Tulsi is one of the easiest herbs to grow in Indian homes. It loves warm weather, grows quickly, and has amazing health benefits. It is also considered sacred in many Indian households, making it a meaningful plant to have.
Pudina (Mint)
Mint grows so easily that sometimes it grows too fast! It spreads quickly, so it is best to keep it in its own pot. You can use mint for chai, chutneys, lemonade, and much more. It is a must-have in any home herb garden.
Dhania (Coriander / Cilantro)
Coriander is used in almost every Indian dish. It grows fast from seeds and does well in partial sunlight. You can harvest the leaves within 3 to 4 weeks of planting.
Curry Leaves
The curry leaf plant is very slow to grow but very rewarding. Once it is established, it keeps giving you fresh leaves for years. It loves lots of sunlight and warmth, making it ideal for Indian gardens.
Rosemary, Basil & Thyme
If you enjoy cooking Italian or Mediterranean food, these three herbs are wonderful choices. They need good sunlight and moderate watering. They also smell absolutely amazing and can make your kitchen feel like a restaurant.
The great thing about a herb garden is that you can mix and match herbs based on what you cook most. Grow what you will actually use!
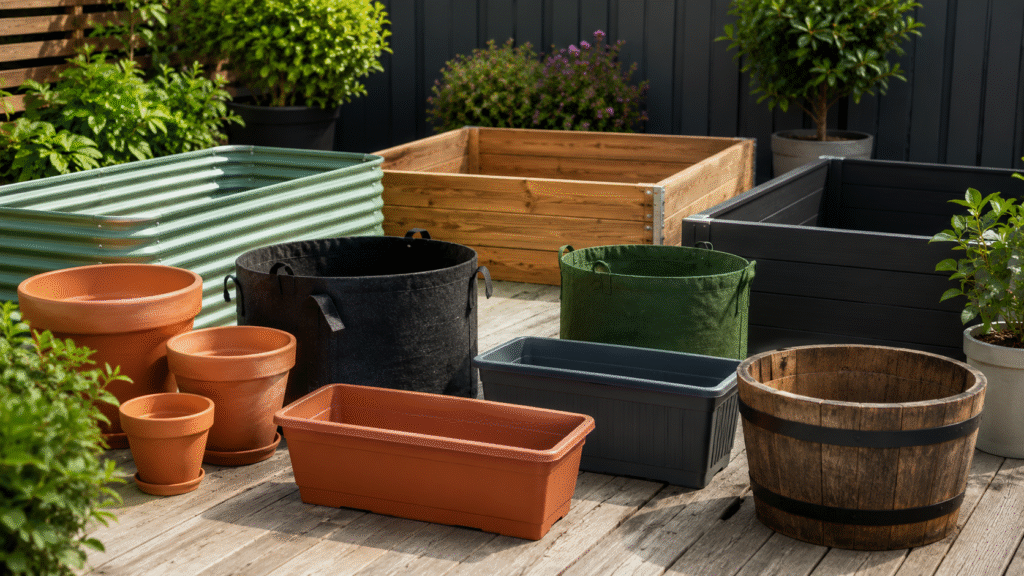
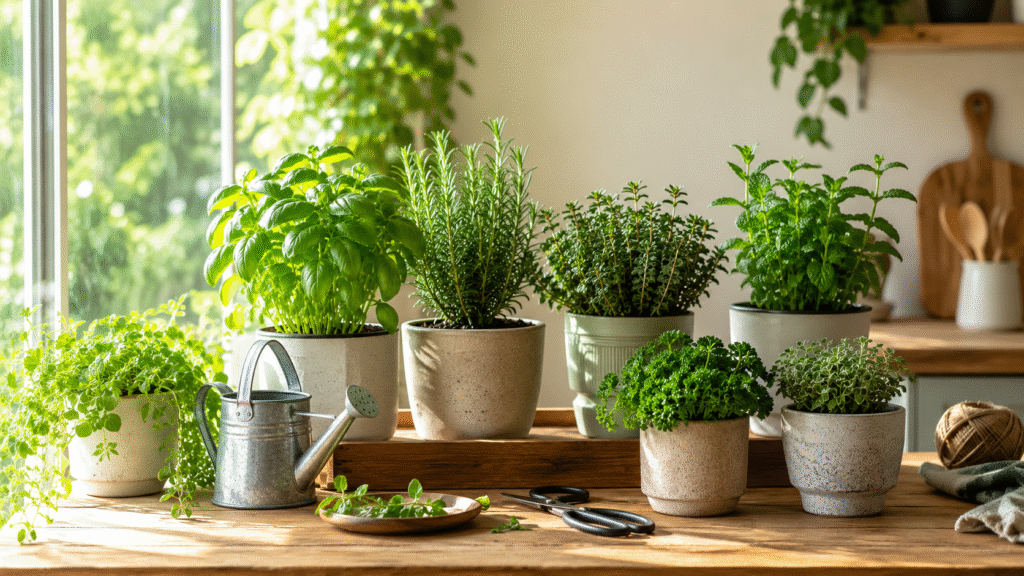
Step 3 – Choose Your Containers or Garden Beds
You do not need to dig up your entire yard to start a herb garden. In fact, most people grow herbs in containers simple pots or boxes that fit anywhere from a window ledge to a small balcony.
Here is what you need to know about choosing containers:
1.Make sure there are drainage holes
This is the most important thing. If water cannot drain out from the bottom of the pot, it will collect and rot your plant roots. Every container must have at least one hole at the bottom.
2. Pick the right size pot
Small herbs like coriander and mint do well in medium-sized pots (at least 6 inches deep). Bigger herbs like rosemary or curry leaves need larger pots – around 10 to 12 inches deep to let their roots spread out comfortably.
3. Use any material you have
Clay pots are great because they absorb extra water and help prevent overwatering. Plastic pots are lighter and hold moisture longer. You can even recycle old kitchen containers, tin cans, or wooden boxes just make sure to drill holes in the bottom.
Maalibhaiya Tip – Try using old stainless steel tiffin boxes or clay matkas (water pots) as containers. They look beautiful and work perfectly for a traditional Indian herb garden setup.
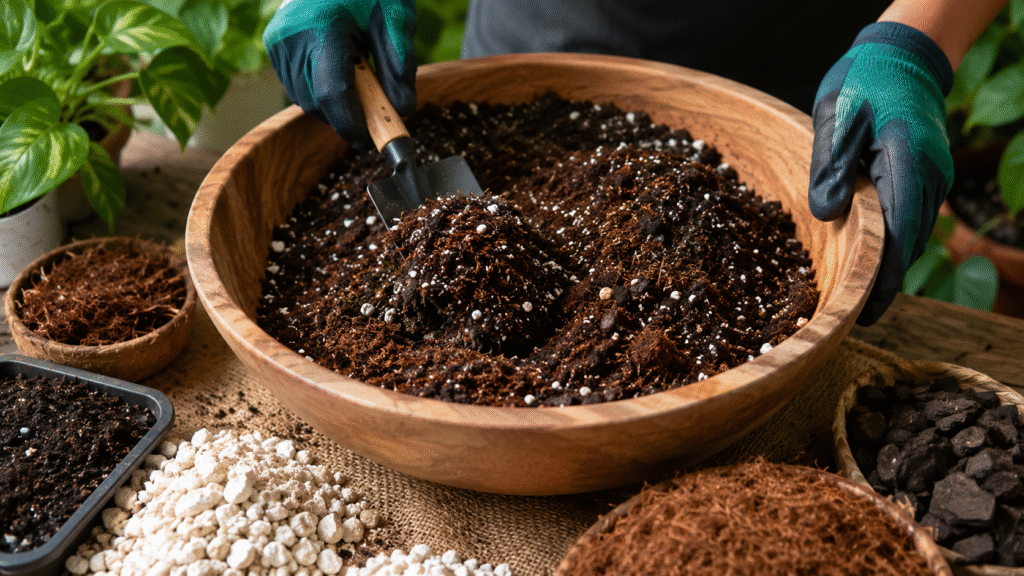
Step 4 – Prepare the Perfect Soil Mix
Soil is the foundation of any good herb garden. The right soil gives your herbs the nutrients, air, and drainage they need to grow healthy and strong.
Do not just use regular garden soil from the ground. That soil is often too heavy and compact, which can suffocate herb roots and hold too much water.
The best soil mix for a home herb garden is:
50% Potting Mix Light & fluffy base
30% Compost Natural nutrients
20% Coarse Sand / Perlite Improves drainage
You can also add neem cake powder to the soil, which is a natural fertilizer and pest repellent. This is a great trick that experienced Indian gardeners use to keep their herb garden healthy without chemicals.
If you buy readymade potting mix from a garden shop, make sure it says “well-draining” on the label. Then add some compost or old decomposed cow dung (gobar khad) to make it even more nutritious.
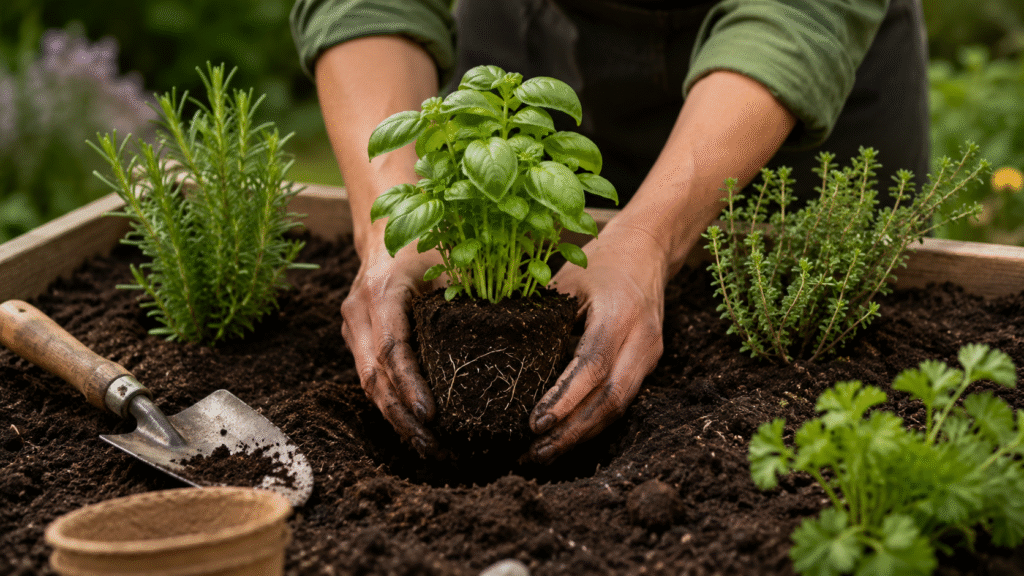
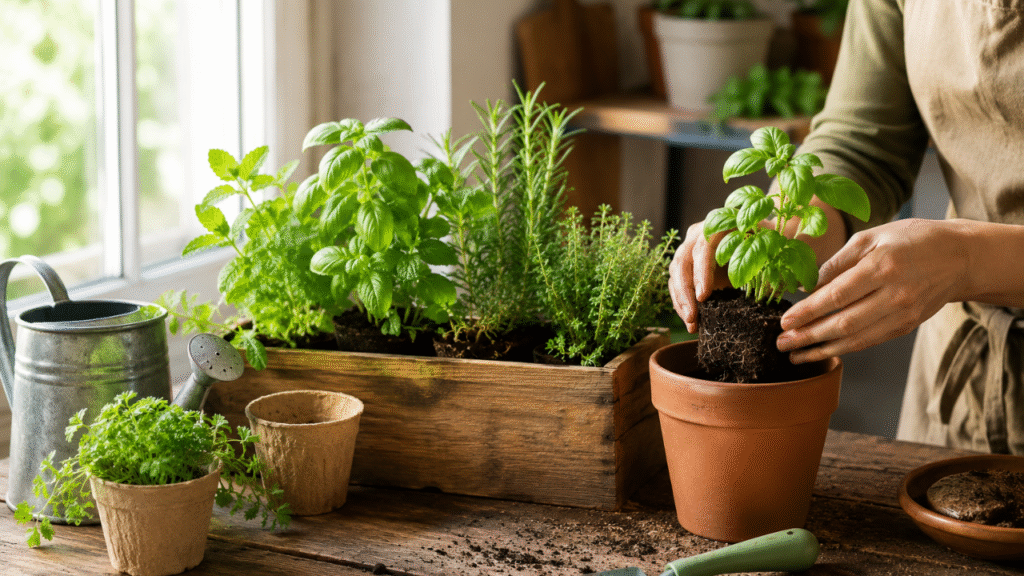
Step 5 – Plant Your Herbs the Right Way
Now comes the fun part actually planting your herb garden! You can grow herbs in two ways: from seeds or from small plants (also called seedlings or saplings).
Seeds are cheaper but take more time. Coriander and fenugreek (methi) grow very well from seeds. Just sprinkle the seeds on the soil, cover lightly, and water gently. You will see tiny sprouts in about 5 to 10 days.
Seedlings are faster. You can buy young plants from a nursery and transplant them into your pots. This is a great option for herbs like mint, tulsi, and curry leaves. Just dig a small hole in your prepared soil, place the root ball inside, and press the soil gently around it.
Here are a few important planting rules to remember for your herb garden:
Plant each herb at the same depth it was growing before. If you are transplanting from a nursery pot, match the same soil level.
Give herbs enough space. Do not crowd them together. Each plant needs room to spread its roots and leaves. Crowding leads to poor growth and more disease.
Water right after planting to help the roots settle into their new home. But do not drench the soil just a gentle, even watering is enough.
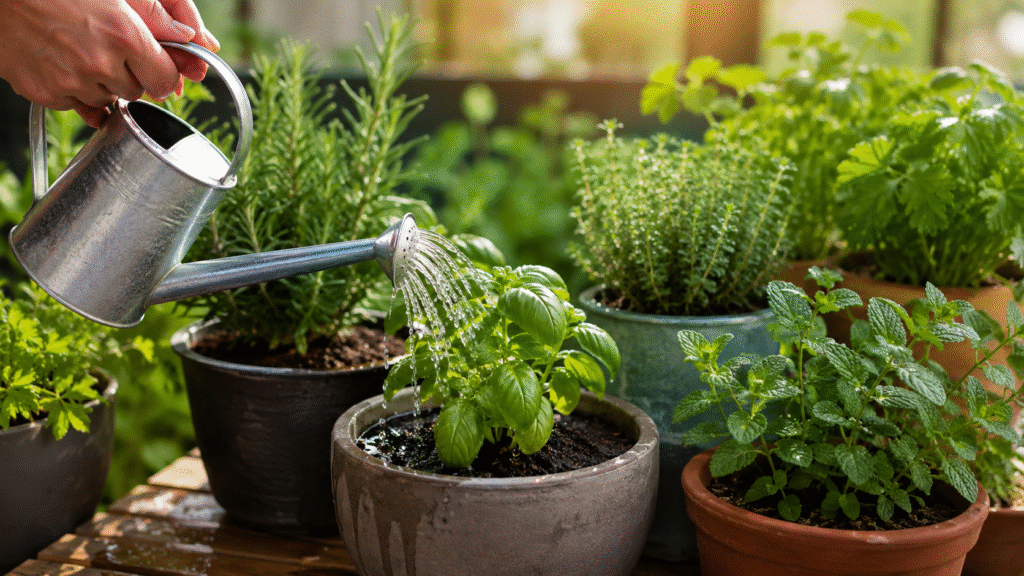
Step 6 – Water Your Herb Garden the Right Way
One of the biggest mistakes beginners make is overwatering. Believe it or not, too much water kills more herbs than too little water. Learning how to water properly is one of the most important skills for a thriving herb garden.
Here is the golden rule: Water your herb garden only when the top inch of soil feels dry. Stick your finger about an inch into the soil. If it feels dry, it is time to water. If it still feels moist, wait another day.
Some general watering tips for your herb garden:
Water in the morning if possible. This gives the plant time to absorb moisture before the afternoon heat evaporates it. It also keeps the leaves dry at night, which prevents fungal problems.
Water at the base of the plant, not on the leaves. Wet leaves in hot weather can cause burning. Wet leaves at night can cause mold and rot.
In summer, herbs may need watering every day. In winter or monsoon, you might only water every 2 to 3 days. Always check the soil before watering.
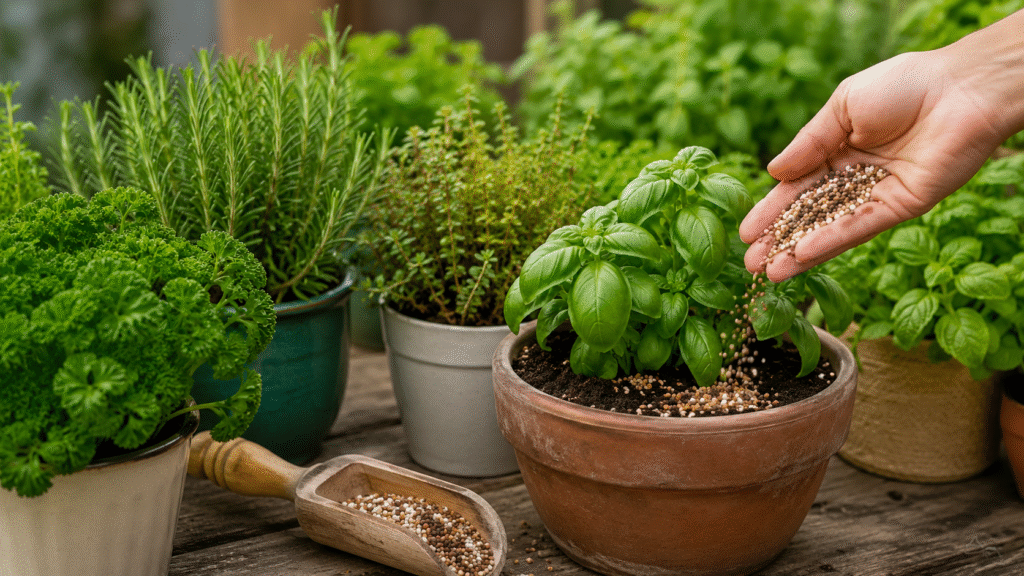
Step 7 – Feed Your Herb Garden with the Right Nutrients
Like all living things, your herbs need food to grow well. After about 3 to 4 weeks of planting, the nutrients in the original soil start to run out. That is when you need to start feeding your herb garden.
You do not need to buy expensive chemical fertilizers. In fact, at Maalibhaiya, we love natural, organic options that are safe for cooking herbs.
Great natural fertilizers for your herb garden:
Vermicompost Rich worm castings
Banana Peel Water Natural potassium boost
Jeevamrut Traditional Indian fertilizer
Diluted Buttermilk Good microbe booster
Cow Dung Compost Gobar khad, time-tested
Feed your herb garden once every 2 to 3 weeks during the growing season (spring and summer). In winter, herbs grow more slowly, so you can reduce feeding to once a month or stop entirely.
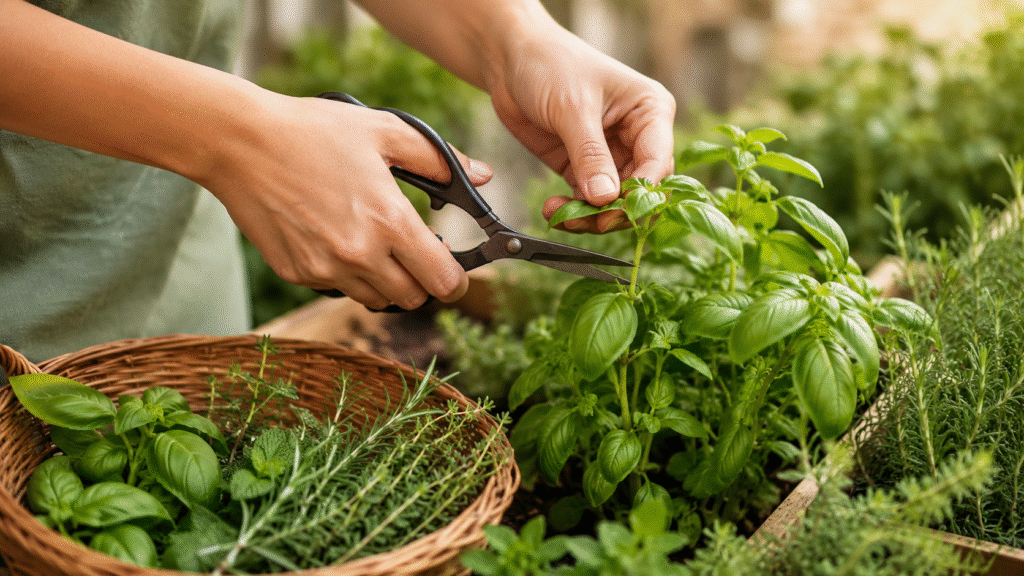
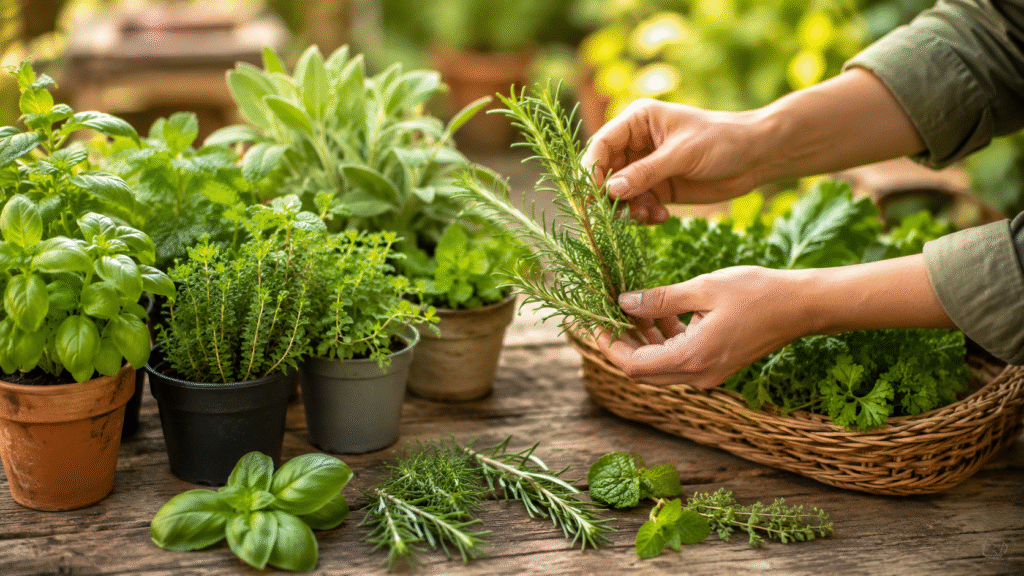
Step 8 – How to Harvest Herbs Without Hurting the Plant
This is the part everyone looks forward to picking your fresh herbs! But harvesting the wrong way can actually damage or kill your plant. Here is how to do it right in your herb garden:
1. Never take more than 1/3 of the plant at once
The plant needs leaves to make food through sunlight (photosynthesis). If you take too many leaves at once, the plant cannot make enough energy to grow back.
2. Always cut from the top
Cutting from the top (the newest growth) actually encourages the plant to become fuller and bushier. It is like giving the plant a little haircut that makes it grow back stronger.
3. Use clean scissors or a knife
Do not just pull or tear the stems. Always use a clean, sharp pair of scissors. Tearing can damage the stem and make the plant more likely to get infected.
4. Pinch off flowers when they appear
When herbs start to flower (called “bolting”), the leaves begin to taste bitter. Pinch off any flowers as soon as you see them. This tells the plant to keep producing tasty leaves instead of seeds.
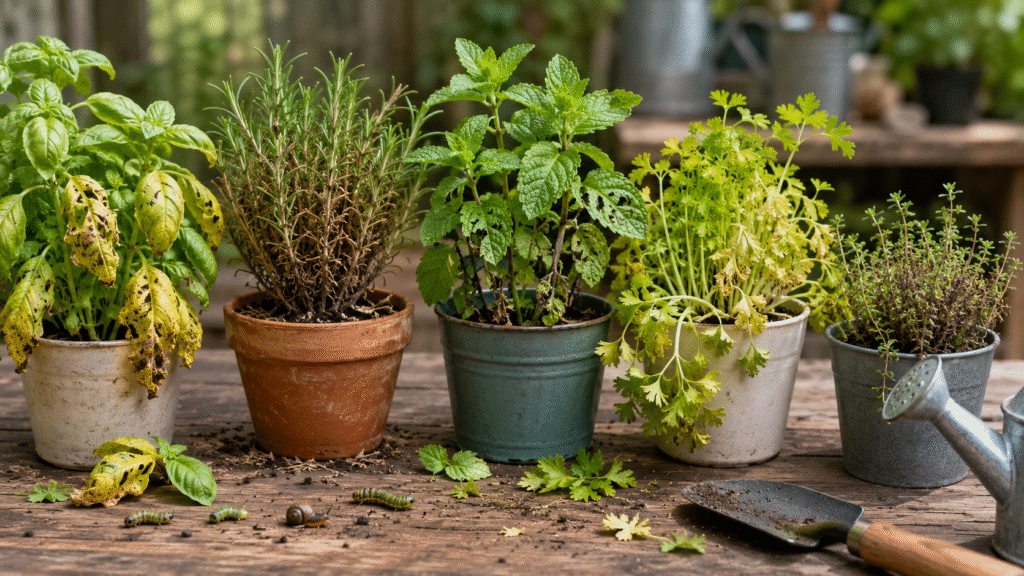
Common Herb Garden Problems and How to Fix Them
Even the most experienced gardeners face problems sometimes. Here are the most common issues people face with their herb garden and simple ways to solve them.
Yellow Leaves
Yellow leaves usually mean the plant is getting too much water. Check your watering routine and make sure the soil has good drainage. Remove the yellow leaves to keep the plant healthy.
Leggy, Tall Plants with Few Leaves
This means your herbs are not getting enough sunlight. They are stretching toward any light they can find. Move your herb garden to a sunnier spot or add a grow light.
Pests like Aphids or Whiteflies
Tiny insects can attack your herbs. A simple solution is to spray neem oil mixed with water on the leaves (both top and bottom). This is a safe, natural pesticide that works really well. At Maalibhaiya, we always recommend organic solutions first.
Wilting Even After Watering
If your herb wilts right after watering, the roots may be rotting because of overwatering. Take the plant out of the pot, remove any black or mushy roots, let the roots dry for an hour, and then repot in fresh, dry soil.
Final Thoughts from Maalibhaiya
Starting your own herb garden at home is one of the most satisfying projects you can take on. It connects you to nature, improves your cooking, saves you money, and gives you the quiet joy of watching something grow because of your care.
The steps are simple: pick the right spot, choose your herbs, prepare good soil, plant them carefully, water wisely, feed them naturally, and harvest with kindness. That is really all there is to it.
Remember – your herb garden does not have to be perfect from day one. Every gardener makes mistakes, and that is how you learn. The more you grow, the better you get. So start small, stay consistent, and enjoy the journey.
Here at Maalibhaiya, we are always here to help you grow whether it is your first pot of mint or a full balcony kitchen garden. We believe that every home deserves a little green, and a herb garden is the perfect place to start.
Now go pick up a pot, grab some seeds, and let your herb garden journey begin. Happy growing!
Frequently Asked Questions About Herb Gardens
1. Can I grow an herb garden in a small apartment?
Absolutely! You only need a sunny windowsill or a small balcony. Many people grow a wonderful herb garden in spaces as small as 2 feet wide. Use vertical shelves or hanging pots to save floor space.
2. How long does it take for herbs to start growing?
It depends on the herb. Coriander and fenugreek can sprout in 5 to 7 days. Mint grows fast too. Slower herbs like rosemary and curry leaves can take a few weeks. Be patient good things take time!
3. Do I need to repot my herbs?
Yes, once your herb outgrows its pot, you should move it to a bigger one. Signs that it is time to repot include roots coming out of the drainage holes or the plant looking crowded and stressed.
4. Can I grow an herb garden without any soil?
Yes, This is called hydroponics growing plants in water with nutrients added. It works well for mint, basil, and coriander. However, for beginners, starting with soil is easier and more forgiving.
5. Which herbs can grow in shade in India?
Mint (pudina), coriander (dhania), and fenugreek (methi) can all tolerate partial shade. They are perfect for apartments with limited sunlight. For the best results though, try to give them at least 3 to 4 hours of indirect light daily.
Explore More at Maalibhaiya
Visit Maalibhaiya.com for more beginner-friendly gardening guides, plant care tips, and organic growing advice made for Indian home gardeners.